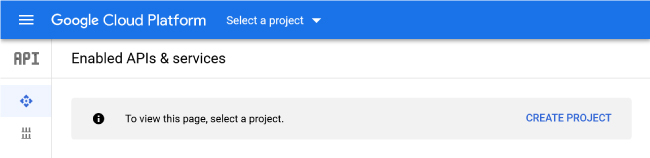
Configure APIs
Navigate to the Google Developers Console at console.developers.google.com. Create a new project from the Select a project dropdown in the top bar or the Create Project link on the right.
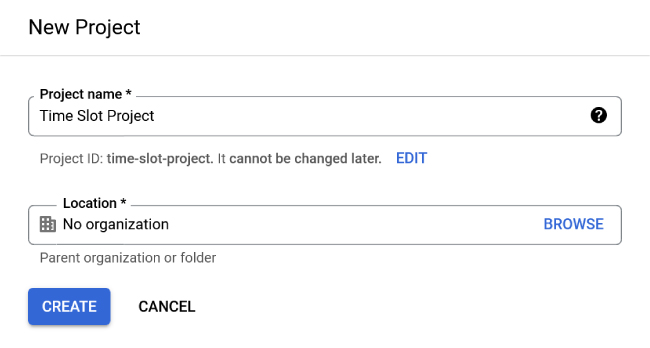
Name Your Project
Give your project a name, and choose a location if applicable. Click the Create button.
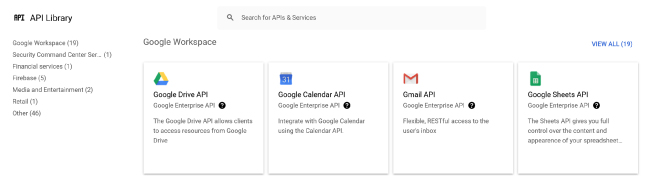
Enable the Calendar API
Select Library from the left sidebar menu, then search for and click on the Google Calendar API.
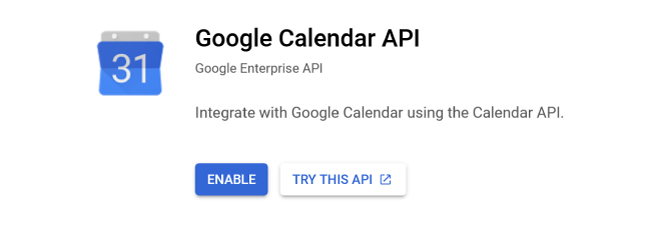
Click on the blue Enable button.
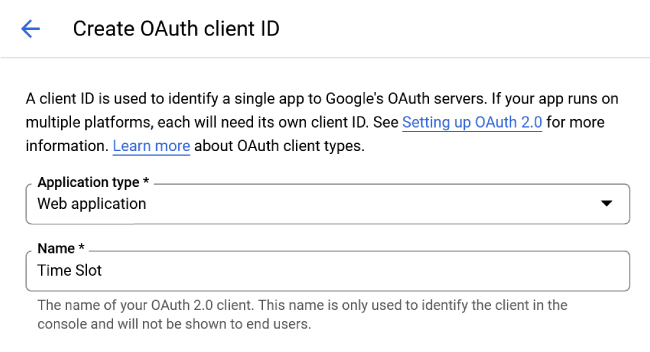
Create Credentials
From within the Google Calendar API section or by choosing Credentials from the left sidebar menu, select Create Credentials. Choose Web Application from the Application Type dropdown and name your client.
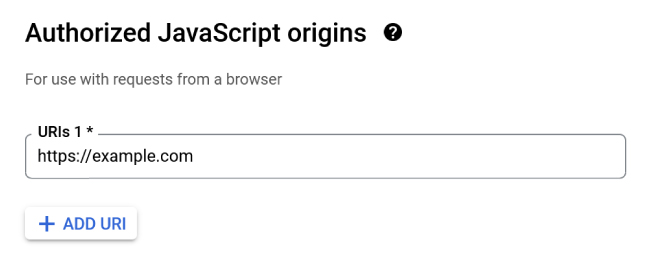
Set Authorized Origin
Enter your website URL into the Authorized JavaScript Origins text box. Include the https:// prefix.
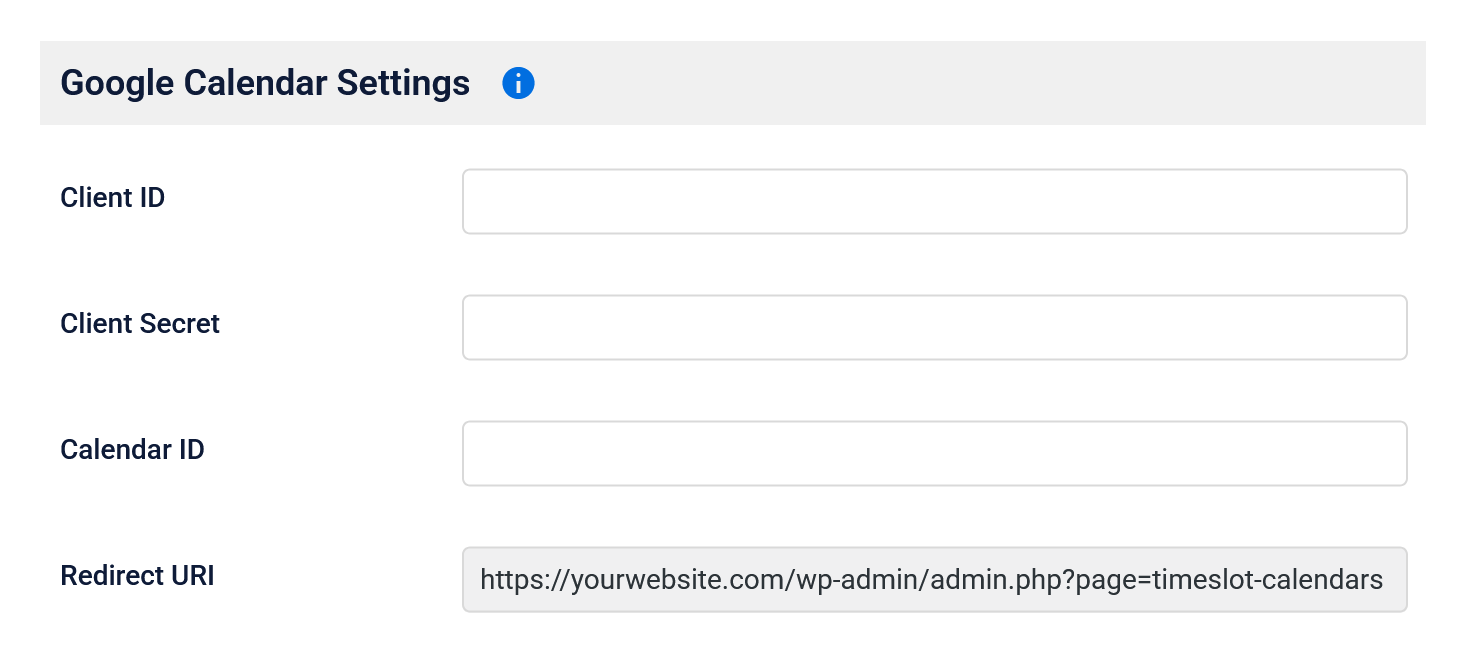
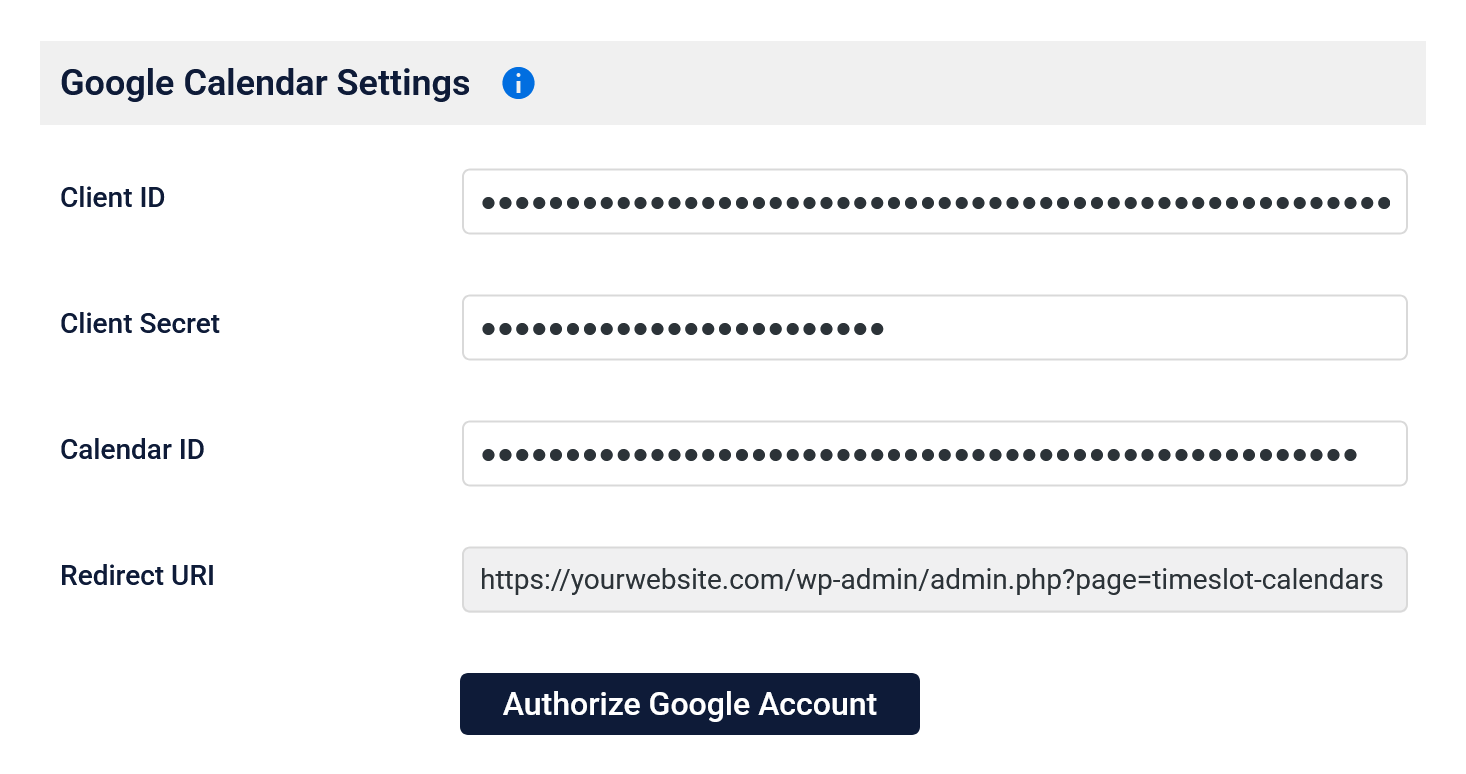
Copy Redirect
Click the Redirect URI text field on the Time Slot calendar page to copy the address.
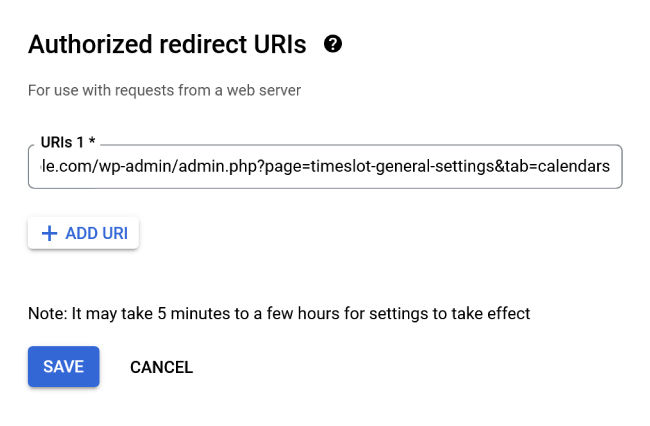
Add Redirect to Google
Paste the copied text into the Authorized Redirect URIs text field in the Google Console. Click the blue save button.
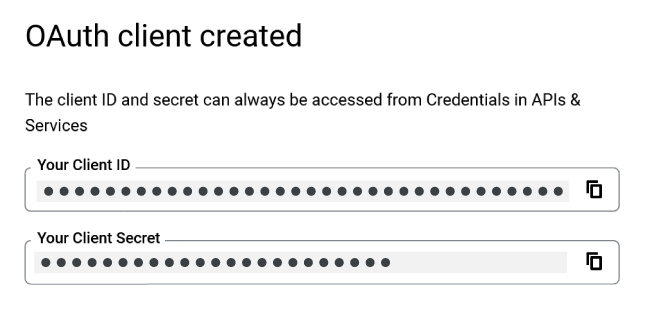
Copy OAuth credentials
Copy the Client ID and Client Secret and paste them into the corresponding text fields in the Time Slot Google Calendar settings.
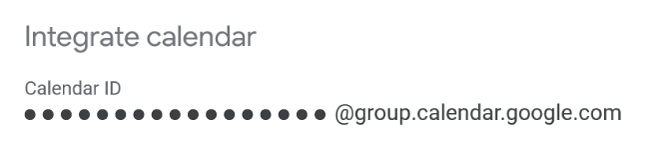
Copy Calendar ID
If you’d like to use a specific calendar, other than the primary calendar in your Google account, navigate to calendar.google.com. Click the gear icon in the top bar, and choose settings from the drop down. In the left sidebar, find Settings for My Calendars and select the calendar you’d like to use. In the Integrate Calendar section, copy the Calendar ID. Paste the ID into the corresponding text field in the Time Slot Google Calendar settings.
Set Public Calendar
On calendar.google.com, follow the step above to find your calendar settings. In the Access permissions for events section, select the checkbox to make the calendar available to the public.

Authorize Google API
Once you’ve pasted the Client ID and Client Secret in the Time Slot settings, click the Save Changes button. Click the Authorize Google Account button that appears. Follow any prompts from Google. You will be redirected back to this settings page.
You’re done!
Test out your new Google Calendar API integration by making a new appointment with the Time Slot booking form, on the appointments page of the Time Slot settings, or follow our guide to add events in your Google Calendar.
Sync Your Google Calendar
Add, update and delete appointments in your Google Calendar or your WordPress dashboard and Time Slot Pro will automatically sync your schedule for you.